Wishing all our creative customers a wonderful and happy new year.
mosaic diy
Getting started
Tips:
- Protect Your Workspace: Use newspaper to protect your work area from glue and grout.
- Work in Sections: Work on small sections at a time to avoid the glue drying prematurely.
- Embrace Imperfections: Mosaics often have a natural charm due to the variation in tile sizes and shapes. Don't worry about achieving perfect uniformity!
- Have Fun! Experiment, explore colors, and enjoy the creative process.
Materials:
- MDF template
- Mosaic tiles (various colors and shapes)
- Glue
- Gloves
- Mask
- 2 x Cotton tips
- Grout
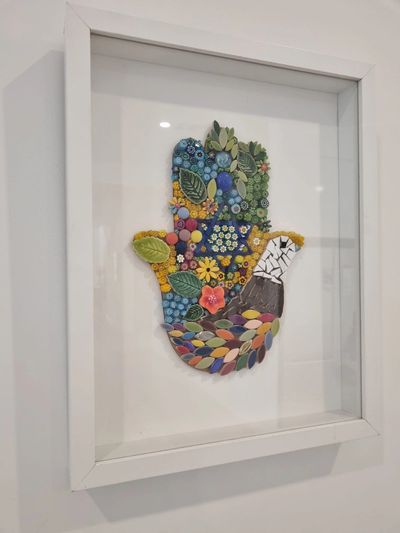
Step 1: Design Your Masterpiece
- Arrange the mosaic tiles on the hamsa template to create your unique design. Experiment with color combinations and patterns. There is no wrong design.
- Aim for matchstick size gaps between the tiles. Smaller gaps create a smoother finished product.
Step 2: Secure the Tiles
- Dip a cotton tip into the glue bottle. Or if you prefer, squeeze from bottle
- Apply a liberal amount of glue under one tile at a time using the cotton tip. Avoid spreading a large amount of glue at once; it may dry before you can place all the tiles.
- Carefully place the tile onto the glued area on the template and press down firmly. Repeat this process for each tile.
Step 3: Patience is Key (Let the Glue Dry!)
Make sure the glue is completely dry before moving on. Rushing this step can result in loose tiles.
Step 4: Grouting
Grouting fills the spaces between the tiles and creates a professional finish. Follow the steps below on grouting.

Grouting
Grouting Your Mosaic Artwork for Beginners (Wet Method)
Grouting is the process of filling the spaces between your mosaic tiles. It strengthens and finishes your artwork. Here's a simple guide to get you started, assuming your mosaic adhesive is dry.
Materials:
- Grout – 1/2 cup
- Water 1/4 cup
- Small bowl
- Spoon (to mix the grout)
- Flat spatula (or old credit/Loyalty card)
- Damp sponge
- Wooden skewer stick
- Soft cloth
- Fresh water
- Gloves
Steps:
- Prepare your workspace: Cover the surrounding area with newspaper to protect from grout splatter. Ensure good ventilation.
- Mix the grout: Wear a mask. Add a little bit of the water at a time to the grout and mix with the spoon until you get a thick, creamy consistency. (Toothpaste consistency). You may not need to use all the water.
- Apply the grout: Working in small sections, spoon out some grout onto the mosaics and use your spatula to press the grout firmly into the spaces between the tiles.
- Fill those gaps: Wearing your gloves, use your fingers to push grout into any stubborn areas, especially around the edges. Make sure all gaps are completely filled for a strong finish. Smooth around the edges with grout so it is evenly covered.
- Wipe away excess: Once a section is grouted, use the damp sponge, rinsed frequently, to remove excess grout from the surface of the tiles. Work diagonally and apply gentle pressure to avoid dislodging grout from the gaps. Rinse the sponge often to keep the water clean.
- Refine and clean: Allow the grout to set for 10-15 minutes, buff the surface with a slightly damp soft cloth to remove any grout haze. Use a wooden skewer stick to pick off any excess dried glue around the tiles.
- Let it dry: Allow the grout to dry completely overnight.
- Sealing (optional): Once completely dry, you can apply a grout sealer for extra protection against stains and moisture (especially for mosaics in wet areas).
Tips:
- Wear gloves for easier cleaning and to protect your hands.
- Don’t walk away or get distracted once you start grouting, as the grout will dry fast.
Enjoy your beautiful grouted mosaic artwork!
